How to lay out a dripper irrigation system
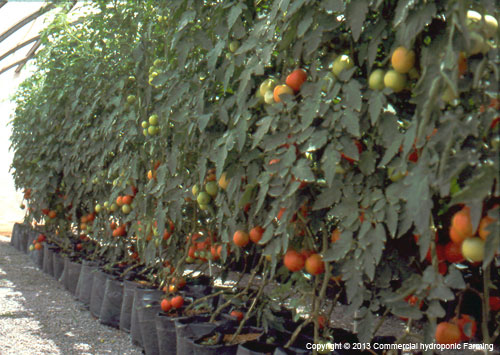
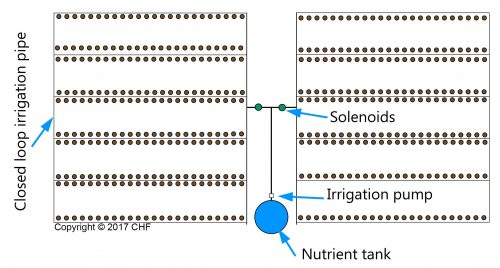
A basic layout of a dripper irrigation system is provided using bags. Note the position of the filters in relation to the pump and water supply. Solenoid valves can be installed but the position will depend on the size of the block or number of plants that need to be irrigated at a time. The pump size, feeder size and dripper type will determine the number of plants that can be irrigated at a time. So there is going to be some maths involved.
The main feeder lines should be installed underground in order to reduce the water temperature and to reduce risk of damaging the pipes. Lower water temperature reduces the formation of bacterial slime and reduces the chance of Pythium and Phytophtera infecting the plants. However, temperatures below 5°C can reduce the uptake of certain elements such as potassium and calcium which in turn can induce deficiency symptoms. Root growth stops below 10°C.
The pumps should be strong enough to provide at least 1-2 bar pressure throughout the growing area. The maximum required is 3-4 bar pressure. It must be noted, do not copy other grower’s design since each system has its own unique properties that only apply to that specific situation. Copying someone else’s design might cause a fatal design error which can be very expensive to rectify after everything has been installed. For instance, pump size and types are determined by friction losses throughout the irrigation system, which will differ from farm to farm. The best is to design 5% above the required capacity.
The filters should be of the type that can be easily cleaned or replaced. Use between 80 and 130 micron filters. These filters are not for disease control. If however nematodes are a problem in the water a 5 micron filter should be installed.
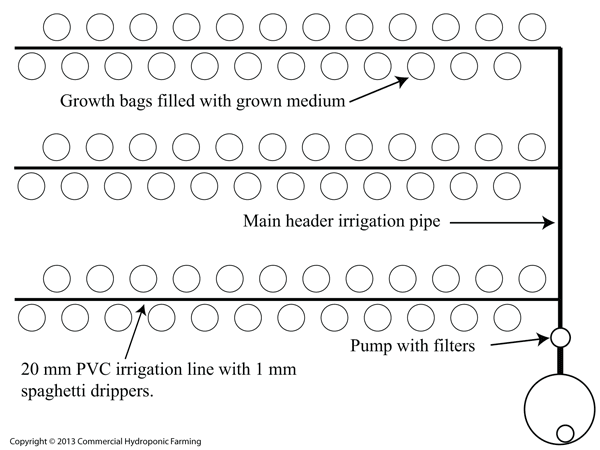
Basic layout of a dripper system with filters, pumps and solenoid valves. Note the location of filters in relation to main water supply (in this case a water tank) and pump.
The above diagram is not 100% right. Ideally the whole system should be in a closed loop. Thus the ends of the irrigation lines must be connected as in the image below. This will help spreading the pressure throughout the system and provide a better distribution of water. It’s not perfect. If there is a slope the lower plants will always receive more water than higher plants. The only way to prevent this is to install pressure compensating drippers (which are expensive). If this does not help, split the length of the irrigation line in two or more sections. So making the line shorter along the slope. Unfortunately you will have to install a timer system since you basically have to different irrigation sections in one tunnel. At the end, the smaller the area that needs to be irrigated the more equal will the water distribution be.
Alternatively the inlet of the main pump can be placed in the middle of the irrigation system and not at the end. This will greatly improve distribution of water.

When installing a dripper system, the ends of the lines must be connected to each other in order to equalise flow rate throughout the system.
You could place the nutrient tank or pumps in the middle and split the whole area in two. It will really depend on how big your area is under cultivation. So you have to optimise the pump capacity with the number of drippers (and also the type of drippers you are using). In my opinion you lose production capacity but the pump does not have to be inside the production area. It really depends on the layout of your farm. Below is just a sample diagram but I hope it helps to create some innovative ideas where you can place the nutient tanks.
Protecting pumps and valves from damage
It cannot be stressed how important small devices such as a pressure regulating valve and inline strainers are.
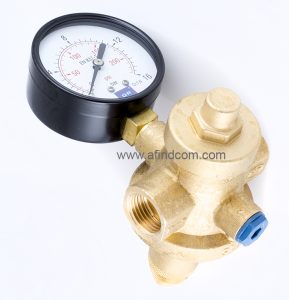
Pressure regulating valves help protect solenoid valves and dripper lines. Too high pressure can either burst low pressure irrigation pipes or release the small dripper pipes from the irrigation pipe. It’s a good idea to have a dial on the pressure regulator so that the pressure can be monitored visually. Ideally there should be an alarm but that is quite advanced and expensive.
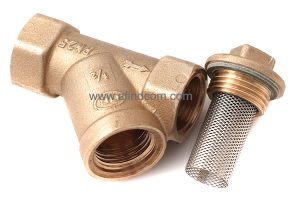
Inline strainers remove small particles that block dripper lines and cause solenoid valves to leak.


